In the Elden Ring Dragon Incantation Build, I’m going to be showing you my Dragon God Guide. This build focuses on the use of Dragon Communion spells and utilizes a new item called Rock Heart to further boost the damage of these spells.
Dragon Communion Build Shadow of the Erdtree
- Elden Ring Dragon Incantation Build – Dragon God
- Elden Ring Dragon Incantation Build – Dragon God: Overview
- Elden Ring Dragon Incantation Build – Dragon God: Equipment
- Elden Ring Dragon Incantation Build – Dragon God: Talismans
- Elden Ring Dragon Incantation Build – Dragon God: Spells
- Elden Ring Dragon Incantation Build – Dragon God: Recommended Attributes Distribution
- Elden Ring Dragon Incantation Build – Dragon God: Final Tips
Elden Ring Dragon Incantation Build – Dragon God
In this Elden Ring Build Guide, I’ll be showing you my Dragon Communion Spell build. This is a Shadow of the Erdtree build that takes place after level 150. If you’ve been looking for a Arcane build for Shadow of the Erdtree that wrecks and makes quick work of enemy bosses then you might want to check this build-out.
- Class: Any
- Flask Spread: Equal Charges
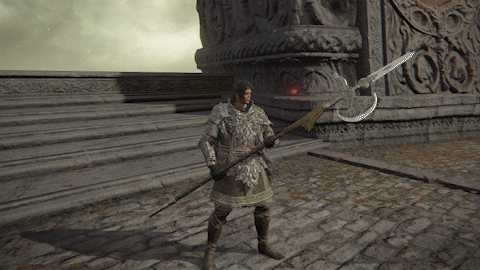
- Main Weapon: Dragon Communion Seal, Bloodfiend’s Fork
- Item/s: Rock Heart
- Shield: N/A
- Armor: N/A
- Talismans: Blue Dancer Charm, Crusade Insignia, Dragoncrest Greatshield Talisman
- Alternate Talismans: Blessed Blue Dew Talisman, Roar Medallion, Flock’s Canvas Talisman
- Primary Stats: Arcane, Vigor, Mind
- Secondary Stats: Faith, Endurance
- Skills: Sword Dance or Braggart’s Roar
- Primary Spells: Golden Vow, Flame Grant me Strength, Ekzyke’s Decay, Rotten Breath, Dragonmaw
- Alternate Spells: Bayle’s Flame Lightning, Ghostflame Breath, Bayle’s Tyranny
- Crystal Tear: Opaline Hardtear, Opaline Bubbletear
- Great Runes: Godrick’s Great Rune or Radahn’s Great Rune
We have over 110 Elden Ring builds. Each one is meticulously crafted to offer unique playstyles, strategies, and experiences, ensuring there’s something for every adventurer in the Lands Between. Whether you seek the raw power of heavy weapons, the finesse of spellcasting, or the versatility of hybrid builds, our collection has you covered. Explore the depths of the game’s mechanics and unleash your full potential with our diverse array of builds.
Elden Ring Dragon Incantation Build – Dragon God: Overview

First, let’s discuss the Rock Heart. Rock Heart is a consumable item that you can use infinitely. To obtain this item, you need to find the Domain of Dragons Painting located in Shadow Keep. It’s not too far in; you just need to get past the Golden Hippopotamus boss, then go down the ladder and find it in a small room under a bridge area. Once you’ve found the painting, you’ll need to go up to the Jagged Peak area of the game. This means going through Dragon’s Pit, defeating the boss there, and then riding up to the mountain to find the spot shown in the painting. Once you do, you’ll have the Rock Heart item. This is a relatively easy item to get quickly if you know where to look. Our Shadow of the Erdtree Map can guide you there easily.

The way this item works is similar to other consumables, but you can’t use it while wearing armor. You’ll need to remove your armor to use it, and once you do, you’ll turn into a dragon. You’ll notice increased resistances and a flat 10% damage negation across all damage types. Additionally, this transformation weighs zero, providing 10% damage negation with no weight. This is particularly useful for builds that utilize the Blue Dancer Charm.
The Blue Dancer Charm boosts physical damage but requires low equip weights. While this may not be the most optimized for every build, it is worth considering for light builds using the Blue Dancer Charm. In dragon form, you can use the consumable again to grant yourself a one-minute buff that increases your Dragon Communion Incantation damage by 20%, significantly boosting your damage. This buff stacks with the Roar Medallion, which has been updated to boost Dragon Communion Seal and Dragon Communion spell damage as well. You’ll have multiple ways to enhance your damage.

From this point, you can take this build in a couple of different directions. I’ll explain my approach, but you could certainly do it differently. I focused on using the Dragon Communion Seal to cast my spells, increasing Arcane and Faith to meet the requirements for some spells, and went the Arcane route. This has its advantages and disadvantages. The main advantage is that I don’t need to use another seal. If you go the Faith route and use the Dragon Communion Seal in your offhand, you’ll have higher incantation scaling for these spells, resulting in more damage.
Holding the Dragon Communion Seal in your offhand grants an extra damage boost. The downside is that I use a weapon and the Dragon Communion Seal while exploring, allowing me to cast spells with L1 or attack with R1 without swapping back and forth. This setup is convenient if you prefer not to manage your inventory constantly during combat. Additionally, I have a bleed weapon set to the occult affinity, benefiting from high Arcane. This way, I have high damage for Dragon Communion spells and a bleed option. If you go the Faith route, you likely won’t use a bleed weapon.
Elden Ring Dragon Incantation Build – Dragon God: Equipment
For this build, I’m using a new weapon called the Bloodfiend’s Fork. What I love about this weapon is that it’s very lightweight, has good reach, native blood loss buildup, and scales with Arcane when you switch to Occult. It offers decent blood loss buildup and damage, making it a reliable backup weapon.

Since this is primarily a caster build optimized for Dragon Communion spells, I’m not focusing on maximizing melee damage. If you prefer, you could choose a different weapon with more damage and weight, but I like the Bloodfiend’s Fork because its lightweight nature allows me to maintain a relatively low equip load, maximizing the benefits of the Blue Dancer Charm. Additionally, this weapon deals 100% physical damage.
The Ash of War you put on the weapon isn’t super important; you can pick any that you like. I find that Sword Dance works well, as it can typically kill an enemy in one use for a relatively low FP cost. Another option is Braggart’s Roar, which increases stamina recovery and damage. However, I’ve noticed it doesn’t boost your damage negation while in dragon form. This might be a bug, and if it’s patched to include damage negation in dragon form, it would be a solid choice. Essentially, you can choose any Ash of War that suits your playstyle.
In my offhand, I have the Dragon Communion Seal. If you were going the Faith route, you would likely use the Erdtree Seal in your main hand, the Dragon Communion Seal in your offhand, and your other weapon in your backup slot, casting from your main hand.
For armor, we’re not wearing any because of the Rock Heart. Since you can’t use armor with this item, there’s no need for it in this build.
Elden Ring Dragon Incantation Build – Dragon God: Talismans

When it comes to talismans for this build, there are several options to consider, but let’s start with the Blue Dancer Charm. This charm increases your damage based on how light your equip load is and only boosts physical damage. This applies to your spells that deal physical damage, which many Dragon Communion spells do, making it highly effective for this build.
The Rock Heart item doesn’t weigh anything, keeping us very lightweight. Spells like Ekzykes’ Decay, Dragonmaw, and Dragonclaw all benefit from this increased damage when you’re lightweight with the Blue Dancer Charm equipped. It boosts both your weapon attack damage and spell damage, which is really beneficial.
While you don’t have to use the Blue Dancer Charm for this build, it fits well because we’re already lightweight and many Dragon Communion spells deal physical damage. However, you can drop it if you prefer to focus on other types of dragon spells without worrying about physical damage.

I also use the Crusade Insignia, which boosts your damage by 15% for 20 seconds after you kill an enemy, refreshing each time you kill one. This applies to both melee attacks and spells, constantly enhancing your damage output.

Another useful talisman for exploration is the Blessed Blue Dew Talisman, which slowly replenishes your FP. This is great for an FP-hungry build, allowing you to use dragon spells regularly without worrying too much about FP management. However, I usually swap this out during boss fights.

For added protection, I use the Dragoncrest Greatshield Talisman. In dragon form, you have a default 10% damage negation, which is quite low, especially in the challenging DLC areas. The Dragoncrest Greatshield Talisman boosts your physical protection by 18 or 19%, giving you about 28 or 29% physical damage negation. Combining this with Erdtree’s Favor and Golden Vow buffs, you get even more protection, making you quite resilient.


You might be wondering about the Roar Medallion. I do use it, typically during boss fights or in place of the Claw Talisman. The Roar Medallion won’t buff your weapon damage directly, but if you use Braggart’s Roar and have the Roar Medallion, your charged heavy attacks will deal more damage. This can be an effective strategy, especially in boss fights where the Claw Talisman might not be as useful.


The Flock’s Canvas Talisman is another good choice, increasing your spell damage. You can slot it in place of the Blessed Dew Talisman during boss fights for more spell power. Additionally, the Shard of Alexander can boost the damage of skills like Sword Dance, making it another viable option.
There are many talismans that work well for this build, and I suggest experimenting with them to find what suits your playstyle best. The setup I use has worked well for me, but feel free to adjust things during boss fights or other challenging encounters.
Elden Ring Dragon Incantation Build – Dragon God: Spells


For spells, we focus on Golden Vow and Flame, Grant Me Strength to boost our damage. Golden Vow also provides added protection, which is crucial for this build. Flame, Grant Me Strength boosts fire and physical damage. Although we don’t have fire spells in this build, it still enhances our physical spells, making it useful. I typically use Flame, Grant Me Strength only before boss fights, while Golden Vow is used more frequently alongside Rock Heart for consistent damage and protection.


The primary offensive spells in this build are Rotten Breath, Ekzykes’s Decay, and Dragonmaw. Rotten Breath is a weaker version of Ekzykes’s Decay, but it can be used from horseback, allowing you to apply Scarlet Rot while riding. This makes it valuable for maintaining mobility in certain fights. Ekzykes’s Decay is more powerful and can set Scarlet Rot early in boss fights, which is extremely helpful. It also deals physical damage, fitting well with our build.

Dragonmaw has several advantages: high burst damage, large hitboxes, and high stance damage, which can break an enemy’s stance after a few casts. Most importantly, it provides hyper armor, allowing you to cast without interruption, even when taking hits. This is critical since you have zero poise in this build. Dragonmaw‘s ability to maintain casting through attacks makes it essential for handling aggressive bosses.
We also consider other new dragon incantations:

Ghostflame Breath is a more FP-efficient version of Borealis’s Mist, offering similar frostbite buildup and slightly more damage. While we don’t use it in this build due to its focus on physical damage, it can be an excellent choice for magic damage builds.

Bayle’s Tyranny deals significant fire AOE damage with hyper armor, similar to Dragonmaw. Although it’s currently less optimal due to potential bugs, it could improve with future patches. It’s both a fire magma spell and a dragon communion spell, making it versatile for talisman boosts.

Bayle’s Flame Lightning combines fire, physical, and lightning damage, with a long-range claw attack. It can be used from further away than Dragonmaw and offers hyper armor. These spells, including Bayle’s Tyranny, have high arcane requirements, making them better suited for builds with significant arcane investment rather than faith.
Ultimately, Dragonmaw remains the most reliable for this build, but keeping an eye on future patches could reveal improvements to Bayle’s Tyranny and Bayle’s Flame Lightning, making them more competitive options.
Elden Ring Dragon Incantation Build – Dragon God: Recommended Attributes Distribution
For attributes at level 165 in this build, I have:

- 55 Vigor: Essential for health, especially with limited protection. You can increase this to 60 for more durability.
- 42 Mind: Provides ample FP for dragon communion spells, which are known for their high FP cost. More FP allows for longer spell casting.
- 25 Endurance: Mainly for stamina, which is needed for rolling and spell casting. You can lower this to 20 or 15 if you find you’re not running out of stamina often.
- 14 Strength and 12 Dexterity: These are to meet the weapon requirements. My weapon needs 14 Strength and 11 Dexterity, and I started with 12 Dexterity, so I couldn’t lower it further.
- 16 Intelligence: This is not necessary for the build and is a leftover from starting as an Astrologer.
- 30 Faith and 50 Arcane: These are crucial for using the dragon communion spells and achieving good scaling with the Dragon Communion Seal.
Initially, I aimed for 45 Arcane and 30 Faith to meet the requirements and get good scaling. Eventually, you’ll want to increase Arcane to 80 and then raise Faith for even better scaling with the Dragon Communion Seal.
If you prefer going the Faith route, you would aim for 80 Faith and only the minimum Arcane needed for the spells, leading to higher spell damage but a trickier setup.
Elden Ring Dragon Incantation Build – Dragon God: Final Tips
For the Flask of Wondrous Physick, I recommend using the Opaline Hardtear to boost protection since we are quite light on defense. This will help mitigate damage from the first hit when entering combat, allowing you to safely cast spells like Dragonmaw or Ekzykes’s Decay. The bubbles provided by this tear can absorb the damage of one hit, which is invaluable when you’re about to engage enemies.

Regarding Great Runes, Radahn’s and Godrick’s are the best choices for this build. Godrick’s Rune is particularly useful because it grants a significant boost to all stats, which can help manage the diverse stat requirements of this build. Radahn’s Rune is also excellent as it increases health, FP, and stamina, all of which are crucial for a dragon communion build.


That wraps up our Dragon God build. I hope you enjoyed this guide. It’s one of the more powerful builds I’ve created so far. As always, let us know if you have questions or other tips in the comments below. We have a ton more builds coming for Elden Ring and Shadow of the Erdtree so stay tuned for those. If you need help finding the spells, items, or equipment in this build, and securing some personal objectives, make sure to check the Elden Ring Map.
Log in to leave a Comment